How to automatically install apache solr multicore localy for drupal

This article will give you the tools to setup fully automated an apache solr multicore localy for drupal.
The advantages: When you have new projects you will only have to create a new apache solr core based on previous configuration. This will save you valuable time.
How does it work? Whatever we have done manualy we can script using bash. This is exactly what we have done to install the apache solr multicore localy.
The script depends on drush, xmlstarlet and curl. The script will detect these dependencies and will try to download them.
Here is the script to install apachesolr and setup the multicore. We will use a second script to setup our cores later.
Install apache solr as a multicore
#!/bin/bash

#Validate if the executing user is root
if [ "$(id -u)" != "0" ]; then
   echo "This script must be run as root" 1>&2
   exit 1
fi

# ******** #
# Funtions #
# ******** #

#Test the connection to the solr installation
function solr_install_test_connection {
  response=$(curl --write-out %{http_code} --silent --output /dev/null <a href="http://127.0.0.1:8983/solr/">http://127.0.0.1:8983/solr/</a>)
  if [ $response != 200 ]; then
    echo -e "\e[00;31m ERROR:Solr installation failed manual intervention needed. Solr reponds at <a href="http://127.0.0.1:8983/solr/">http://127.0.0.1:8983/solr/</a> with http code: $reponse  \e[00m"
  else
    echo -e "\e[00;32m NOTICE:Solr reponds at <a href="http://127.0.0.1:8983/solr/">http://127.0.0.1:8983/solr/</a> with http code:$response  \e[00m"
  fi
}

# ****** #
# Script #
# ****** #

#Install the needed sources if needed: drush, curl and java
DRUSH=`command -v drush`
if [ -z "$DRUSH" ]; then
  apt-get install drush
  echo -e "\e[00;33m NOTICE:Drush installed \e[00m"
else
  echo -e "\e[00;33m WARNING:Drush already installed at '$DRUSH' \e[00m"
fi

CURL=`command -v curl`
if [ -z "$CURL" ]; then
  apt-get install curl
  echo -e "\e[00;33m NOTICE:Curl installed \e[00m"
else
  echo -e "\e[00;33m WARNING:Curl already installed at '$CURL' \e[00m"
fi

JAVA=`command -v java`
if [ -z "$JAVA" ]; then
  add-apt-repository ppa:webupd8team/java
  apt-get update
  apt-get install oracle-java7-installer
  echo -e "\e[00;32m NOTICE:Java installed \e[00m"
else
  echo -e "\e[00;33m WARNING:Java already installed at '$JAVA' \e[00m"
fi

#Download solr sources
SOURCE=apache-solr-3.6.2.zip
FOLDER=apache-solr-3.6.2
FILE=/opt/$SOURCE
if [ ! -e $FILE ]; then
  mkdir -p /opt
  cd /opt
  wget <a href="http://apache-mirror.telesys.org.ua/lucene/solr/3.6.2/">http://apache-mirror.telesys.org.ua/lucene/solr/3.6.2/</a>$SOURCE

  echo -e "\e[00;32m NOTICE:Sources downloaded  \e[00m"
else
  echo -e "\e[00;33m WARNING:Source already downloaded skipping \e[00m"
fi

#Extraction of the zip file containing the solr sources
DIR=/opt/apache-solr-3.6.2
if [ ! -d $DIR ]; then
  echo -e "\e[00;32m NOTICE:Extracting sources  \e[00m"
  cd /opt
  unzip $SOURCE > /dev/null
  echo -e "\e[00;32m NOTICE:Apachesolr dir created  \e[00m"
else
  echo -e "\e[00;33m WARNING:Apachesolr dir already exists skipping \e[00m"
fi

#Create the multicore folder - name it like you want
DIR=/opt/$FOLDER/dropsolid
if [ ! -d $DIR ]; then
  cp -rf /opt/$FOLDER/example /opt/$FOLDER/dropsolid
  echo -e "\e[00;32m NOTICE:Dropsolid dir created  \e[00m"
else
  echo -e "\e[00;33m WARNING:Dropsolid dir already exists skipping \e[00m"
fi

#Install and configure multicore solr.xml to the multicore folder
NEW=`grep core0 /opt/$FOLDER/dropsolid/solr/solr.xml`
if [ -z "$NEW" ]; then
  rm /opt/$FOLDER/dropsolid/solr/solr.xml
fi
FILE=/opt/$FOLDER/dropsolid/solr/solr.xml
if [ ! -e $FILE ]; then
  cp -f /opt/$FOLDER/dropsolid/multicore/solr.xml /opt/$FOLDER/dropsolid/solr/solr.xml
  sed -i 's@<core name="core1" instanceDir="core1" />@@g' /opt/$FOLDER/dropsolid/solr/solr.xml

  echo -e "\e[00;32m NOTICE:Solr.xml copied multicore setup complete  \e[00m"
else
  echo -e "\e[00;33m WARNING:Solr.xml already installed, skipping \e[00m"
fi

#Create the start|stop|restart script /etc/init.d/solr
FILE=/etc/init.d/solr
if [ ! -e $FILE ]; then
echo '#!/bin/sh -e

# Starts, stops, and restarts solr

SOLR_DIR="/opt/'$FOLDER'/dropsolid/"
JAVA_OPTIONS="-Xmx1024m -DSTOP.PORT=8079 -DSTOP.KEY=stopkey -jar start.jar"
LOG_FILE="/var/log/solr.log"
JAVA="/usr/bin/java"

case $1 in
    start)
        echo "Starting Solr"
        cd $SOLR_DIR
        $JAVA $JAVA_OPTIONS 2> $LOG_FILE &
        ;;
    stop)
        echo "Stopping Solr"
        cd $SOLR_DIR
        $JAVA $JAVA_OPTIONS --stop
        ;;
    restart)
        $0 stop
        sleep 1
        $0 start
        ;;
    *)
        echo "Usage: $0 {start|stop|restart}" >&2
        exit 1
        ;;
esac' > /etc/init.d/solr

  #Set permissions
  chmod a+rx /etc/init.d/solr
  /etc/init.d/solr start
  sleep 5

  #verify the connection
  solr_install_test_connection

  echo -e "\e[00;32m NOTICE:Solr installation completed  \e[00m"
else
  echo -e "\e[00;33m WARNING:Solr already installed, skipping \e[00m"
fi

#Configure solr for drupal with solr files from search api solr module
#Also download apachesolr modules
cd /opt/$FOLDER/dropsolid
DIR=/opt/$FOLDER/dropsolid/search_api_solr
if [ ! -d $DIR ]; then
  drush dl search_api_solr
  cp -rf multicore/core0/ solr/
  cp -rf solr/conf/* solr/core0/conf/
  cp -rf search_api_solr/solr-conf/3.x/* solr/core0/conf/

  #Reduce the time needed strat processing sent documents - we are local so we want to test fast (tip from Nick Veenhof via Nicolas Leroy)
  sed -i 's@<maxTime>120000</maxTime>@<maxTime>2000</maxTime>@g' solr/core0/conf/solrconfig.xml

  #Add this for future use of apachesolr instead of search api solr (we can prepare cores using the files from these modules too)
  sudo drush dl apachesolr-6.x --destination=apachesolr-6.x -y
  sudo drush dl apachesolr-7.x --destination=apachesolr-7.x -y

  echo -e "\e[00;32m NOTICE:Search api setting installed  \e[00m"
else
  echo -e "\e[00;33m WARNING:Search api settings already there, skipping \e[00m"
fi

#Exit output
echo -e '\e[00;32m Use the solr-instance script to install cores for your project. Execute sudo "./create-solr-instance.sh". \e[00m'
How to use it?
Create a file called solr-install.sh and paste the above code in it. Then execute as root:
sudo ./solr-install.sh
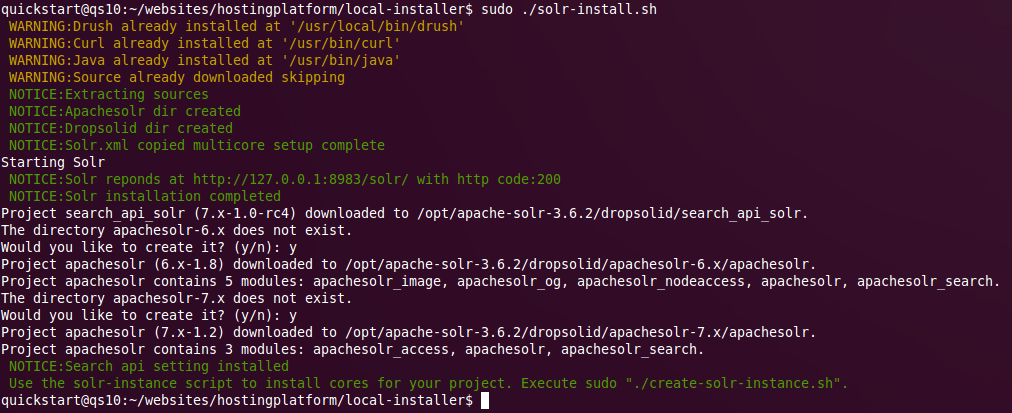
If everything goes as planned you will see this:

Install independent apache solr multicore
Create solr multicore instances with this script
#!/bin/bash

#Validate if executing user is root
if [ "$(id -u)" != "0" ]; then
   echo "This script must be run as root" 1>&2
   exit 1
fi

PROJECT=$1

if [[ -z $PROJECT ]]; then
  echo -e "\e[00;31m please provide a projectname as 1st variable \e[00m"
  echo -e "\e[00;31m please provide an optional var to indicate to use the apachesolr module (type:apachesolrd6 or apachesolrd7) as 2nd variable \e[00m"
  echo ' '
  exit
else
  echo ' '
  echo '*************Solr env creation started**************'
  echo ' '
fi

# ******** #
# Funtions #
# ******** #

#Test connection to apache solr
function solr_install_test_connection {
  response=$(curl --write-out %{http_code} --silent --output /dev/null <a href="http://127.0.0.1:8983/solr/">http://127.0.0.1:8983/solr/</a>)
  if [ $response != 200 ]; then
    rm /etc/init.d/solr
    echo -e "\e[00;31m ERROR:Solr installation failed manual intervention needed. Solr reponds at <a href="http://127.0.0.1:8983/solr/">http://127.0.0.1:8983/solr/</a> with http code: $reponse  \e[00m"
  else
    echo -e "\e[00;32m NOTICE:Solr reponds at <a href="http://127.0.0.1:8983/solr/">http://127.0.0.1:8983/solr/</a> with http code:$response  \e[00m"
  fi
}

# ****** #
# Script #
# ****** #

#Install xml starlet if needed
XMLSTARLET=`command -v xmlstarlet`
if [ -z "$XMLSTARLET" ]; then
  apt-get install xmlstarlet
  echo -e "\e[00;32m NOTICE:xmlstarlet installed \e[00m"
else
  echo -e "\e[00;33m WARNING:Xmlstarlet already installed at '$XMLSTARLET' \e[00m"
fi

#Variables
SOLR=/opt/apache-solr-3.6.2/dropsolid/solr

#Copy a preconfigured core to use as a basis for our (see solr-install.sh)
ENV=local
DIR=$SOLR/${PROJECT}_$ENV
if [ -d $DIR ]; then
  echo -e "\e[00;33m $DIR exists, skipping SOLR env $ENV creation\e[00m"
else
  cp -r $SOLR/core0 $SOLR/${PROJECT}_$ENV
  echo -e "\e[00;32m Solr env $ENV created in $DIR\e[00m"
fi

#Add entry to solr.xml for our new core
ENTRIE=`grep -o "${PROJECT}_$ENV" $SOLR/solr.xml | head -n1`
if [ "$ENTRIE" == "${PROJECT}_$ENV" ]; then
  echo -e "\e[00;33m Entry ${PROJECT}_$ENV exists in $SOLR/solr.xml, skipping SOLR env $ENV creation in solr.xml\e[00m"
else
  #add entry
  cd $SOLR
  xmlstarlet ed --subnode "/solr/cores" --type elem -n core -v "" solr.xml > output-solr-${PROJECT}_$ENV.xml
  sed -i 's@<core></core>@<core name="'${PROJECT}_$ENV'" instanceDir="'${PROJECT}_$ENV'" />@g' output-solr-${PROJECT}_$ENV.xml
  cp -f output-solr-${PROJECT}_$ENV.xml solr.xml

  echo -e "\e[00;32m Solr env $ENV added to solr.xml $DIR\e[00m"
fi

#if apachesolr d6 - this will override solrconfig.xml and schema.xml with version from apachesolr module for D6
if [ "$2" == 'apachesolrd6'  ]; then
  cd $SOLR
  cp -rf ../apachesolr-6.x/apachesolr/solr-conf/solr-3.x/* $SOLR/${PROJECT}_$ENV/conf/
  echo -e "\e[00;32m Core modified to work with apachesolr d6 module \e[00m"
fi

#if apachesolr d7 - this will override solrconfig.xml and schema.xml with version from apachesolr module for d7
if [ "$2" == 'apachesolrd7'  ]; then
  cd $SOLR
  cp -rf ../apachesolr-7.x/apachesolr/solr-conf/solr-3.x/* $SOLR/${PROJECT}_$ENV/conf/
  echo -e "\e[00;32m Core modified to work with apachesolr d7 module \e[00m"
fi


#Restart solr
service solr restart
sleep 5
solr_install_test_connection

#Exit output
echo -e "\e[00;32m Now you can use <a href="http://127.0.0.1:8983/solr/"">http://127.0.0.1:8983/solr/"</a>$PROJECT"_local/ as a connection in your drupal installations. Admin: <a href="http://127.0.0.1:8983/solr/"">http://127.0.0.1:8983/solr/"</a>$PROJECT"_local/admin/. Check out all your cores at <a href="http://127.0.0.1:8983/solr/">http://127.0.0.1:8983/solr/</a> \e[00m"
How to use it?
./create-solr-instance.sh [projectname] [optinal: apachesolrd6 or apachesolrd7]
Use the second optional parameter if you want to install apache solr multicore for the http://drupal.org/project/apachesolr module (suffix with d6 or d7). By default the settings from the http://drupal.org/project/search_api_solr module will be installed. So dont use the second param if you are using those modules.
./create-solr-instance.sh dropsolidsite
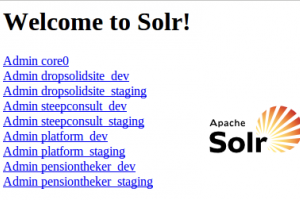
You should get a result like this:

Review
Go through this script piece by piece so you can learn some bash and learn to use this to your advantage. As drupal developers we are more or less php developers but learning some bash can be a great time saver. For example this script saved me countless hours. Everytime I had to install a multicore on a vm or on somebodies installation I m coaching, we are winning valueable time. You could even use this to control your production installation too.
Read the comments carefully and understand what every step does. We can be lazy by letting the automated scripts do the work for us but we can't allow ourselves to become stupid. You still need to understand what happens. You will need to know how it works because automated stuff always breaks sooner or later.
Other advantages
As already told this script just saves time by automating a repetitive task. But there are some other advantages.
I also use this as an instrument to teach junior drupal developers about apache solr without having them loose to much time on the details. They can set up a solr instance quickly and continue to be productive. In their training time and/or spare time they can pick apart the script like we will do now and learn about the details.
Another advantage is: You know by using the script to install an apache solr multicore localy that everyone has the same configuration. There are so much tutorials on how to set up solr on the web it becomes very possible that everyone in the team has a differten version/setup.
Conclusion
Using scripts to automate these tasks like installing apache solr is highly recommended. But you should always know what you are executing. Always be carefully to review things so you know what to do if the automations break down .

Add new comment