Hoe maak je een "page manager" plugin
Guest post by Jonathan Ramael
For my previous project a customer required a list of brands (taxonomy vocabulary) that linked to a product. On this product page there would be an overview of products with the same brand and product type (eg. Watches of the brand Rado).
So basically the list of tax terms functions as navigation.
Since we didn't want to link to the taxonomy term itself but to the product that referenced the term, we had to do some custom coding.
The customer didn't specify which product each term would have to link to, so we opted for the latest added product.
The product page was created with page manager because we needed different layouts for different product types. And that's where the page manager plugin comes in to play.
I'll take you through the process:
We're adding this plugin to our custom Dropsolid glue module, which is located at sites/all/modules/custom/, there we have the folder glue_site/ (our module folder).
First of all we tell ctools where to find the plugin, we do this in glue_site.module, right inside the glue_site folder
//glue_site.module

/**
 * Implements hook_ctools_plugin_directory()
 *
 * @param type $owner
 * @param type $plugin_type
 * @return type
 */
function glue_site_ctools_plugin_directory($owner, $plugin_type) {
  // We'll be nice and limit scandir() calls.
  if ($owner == 'ctools' && ($plugin_type == 'content_types' )) {
    return 'plugins/' . $plugin_type;
  }
}
This function says that we're making a plugin for ctools, of the type 'content_type'.
This way we make sure only the right module gets told about the plugin, and the module knows where to look for it, this also ensures it searches the disk for files only when the right type is provided. By the way: a 'content type' in ctools is a pane, like provided by views for example.
The rest of our code is going in a file called glue_site.products.inc, located in the content_types folder,
The current file structure is like this:
modules/custom/glue_site/
modules/custom/glue_site/glue_site.info
modules/custom/glue_site/glue_site.module
modules/custom/glue_site/plugins/
modules/custom/glue_site/plugins/content_types/
modules/custom/glue_site/plugins/content_types/glue_site,products,inc
So far, so good, this wasn't hard, now for the rest of the plugin:
First we define the plugin, like so:
//glue_site.products.inc

$plugin = array(
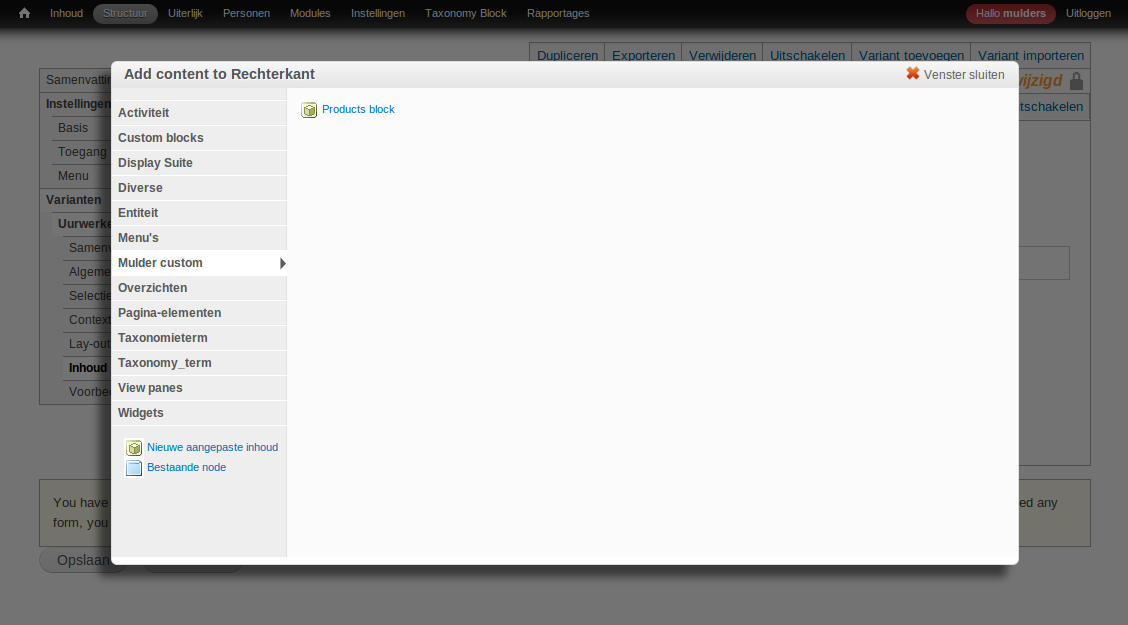
  'title' => t('Products block'),
  'single' => TRUE,
  'category' => array(t('Mulders custom'), -9),
  'edit form' => 'glue_site_content_type_products_edit_form',
  'render callback' => 'glue_site_content_type_products_render',
  // The default context.
  'defaults' => array('rendering' => ''),
  'all contexts' => TRUE,
);
We'll also provide a context in page manager, defining which term the product has to be referencing.

Note: this block(actually a pane) will only be available in page manager, not on the normal blocks page in drupal.
Once we've done that we can head off to our first function:
//glue_site.products.inc

function glue_site_content_type_products_render($subtype, $conf, $args, $context) {

  $block = new stdClass;
  $block->title = t('Brand links to product');

  $product_type_tid = $context['context_entity:taxonomy_term_1']->data->tid;
  $product_type_name = $conf['rendering'];

  $block->content = glue_site_create_block_content($product_type_tid, $product_type_name);

  return $block;
}
$subtype: in this case it's glue_site.products, it's needed for ctools to find your plugin
$conf: contains the input from the fields in the block ui
$args: empty but it's still needed, otherwise the function won't do it's job
$context: contains the contexts we set on the page manager ui
Then we declare $block as an stdClass and give it a title, after that we declare the variables we need in the next function.
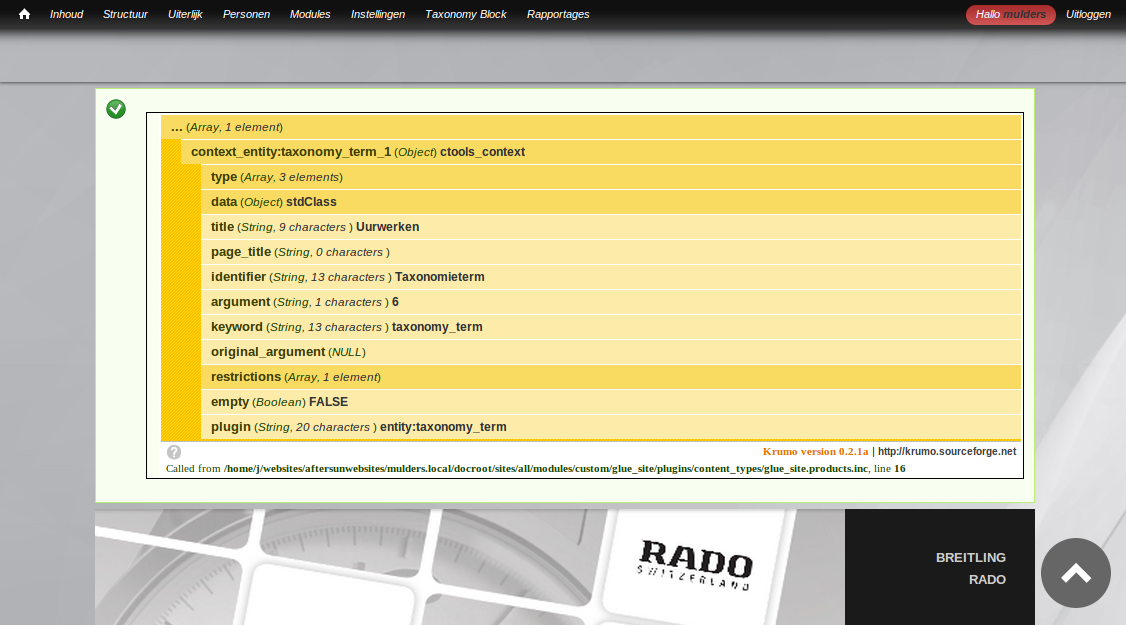
We get $product_type_tid from the context, you can use dsm($context); to find out what you need, then we get $product_type_name from the configuration field in the pane ui.

This is an example of using dsm($context); to see what's inside.
Next:
/**
 * Callback to construct block
 *
 * @param type $product_type_tid
 * @param type $product_type
 * @return string
 */
function glue_site_create_block_content($product_type_tid, $product_type) {


  global $language;//current language
  $vid = 2; //brands vocabulary id
  $terms = taxonomy_get_tree($vid);//get all terms
  $termlist = array(); //array will be populated with the links we create
  $data = '';//the output

  foreach ($terms as $term) {

    $query = new EntityFieldQuery;

    $result = $query
        ->entityCondition('entity_type', 'node')
        ->propertyCondition('status', 1)//the node is published
        ->propertyOrderBy('created', 'desc')//we want the newest first
        ->range(0, 1)//we only need the first one returned
        ->fieldCondition('field_product_producttype', 'tid', $product_type_tid, '=')//the referenced term 'uurwerken'
        ->fieldCondition('field_product_brand', 'tid', $term->tid, '=')//the current brand term id
        ->propertyCondition('language', $language->language, '=')//only get nodes in the current language
        ->execute();

    if ($result) {

      //create the link to the products returned from the query
      if ($product_type == 'uurwerken' ) {

        foreach ($result['node'] as $node) {

          $termlist[] = l($term->name, drupal_lookup_path('alias', "node/" . $node->nid));
//I fetched the alias to build the link to the product

        }//end foreach $result['node'] as $node
      }
      elseif ($product_type == 'juwelen') {
	//some other logic
      }
    }//end if


  }//end foreach $terms as $term

  if ($product_type == 'uurwerken') {
    $data = glue_site_render_watches($termlist);
  }
  elseif ($product_type == 'juwelen') {
    $data = glue_site_render_jewels($termlist);
  }


  return $data;
}
The comments explain what the EntityFieldQuery does.
The last part of the function is some regular php code to basically do whatever you want once you got the results from the query.
The next function simply renders our links as a list.
function glue_site_render_watches($termlist) {


  $vars['items'] = $termlist;
  $vars['title'] = null;
  $vars['type'] = "ul";
  $vars['attributes'] = array('id' => 'taxonomylist');

  $data = theme_item_list($vars);//drupal api

  return $data;
}

function glue_site_render_jewels($termlist) {

  //some magical code doing anything you want

}
Now we're almost there, there are just 2 more small functions, but they're very important to actually get the form to work in the page manager ui:
With this one we create the form, this can be very basic, but also very powerfull, it allows the user to fill in the required values in the form instead of having to do it in code.
/**
 * 'Edit form' callback for the content type.
 */
function glue_site_content_type_products_edit_form($form, &$form_state) {
  // No settings beyond context, which has already been handled.
  $conf = $form_state['conf'];

  $form['rendering'] = array(
    '#type' => 'textfield',
    '#title' => t('rendering'),
    '#default_value' => !empty($conf['rendering']) ? $conf['rendering'] : '',
    '#description' => t('Fill in rendering type juwelen or uurwerken'),
  );

  return $form;
}
This renders one textfield in the form, you can add as many as you want.
This final function is the submit handler of the form, it saves the entries in the form:
/**
 * Submit function, note anything in the formstate[conf] automatically gets saved
 * Notice, the magic that automatically does that for you.
 */
function glue_site_content_type_products_edit_form_submit(&$form, &$form_state) {

  foreach (array_keys($form_state['plugin']['defaults']) as $key) {
    if (isset($form_state['values'][$key])) {
      $form_state['conf'][$key] = $form_state['values'][$key];
    }
  }
}
That's it, spend some time familiarizing with it and before you know you'll have the hang of it. It's not that difficult once you get it and it's very very powerfull.
Have fun!


Add new comment